fbpx

3 Tips for Better Blog Photos

tips for better blog photos

Share it:

Facebook
Twitter
Pinterest
Email

So you bought a DSLR camera to improve your blog photography, but you aren’t exactly sure how to use it to its full potential. Here are a few simple tips that you can implement right away to improve the quality of your photographs, and I won’t even require you to read your manual…yet. Ha! One more thing: I purposely did not retouch these photographs with fancy editing software so you can see that you can get it right in-camera.
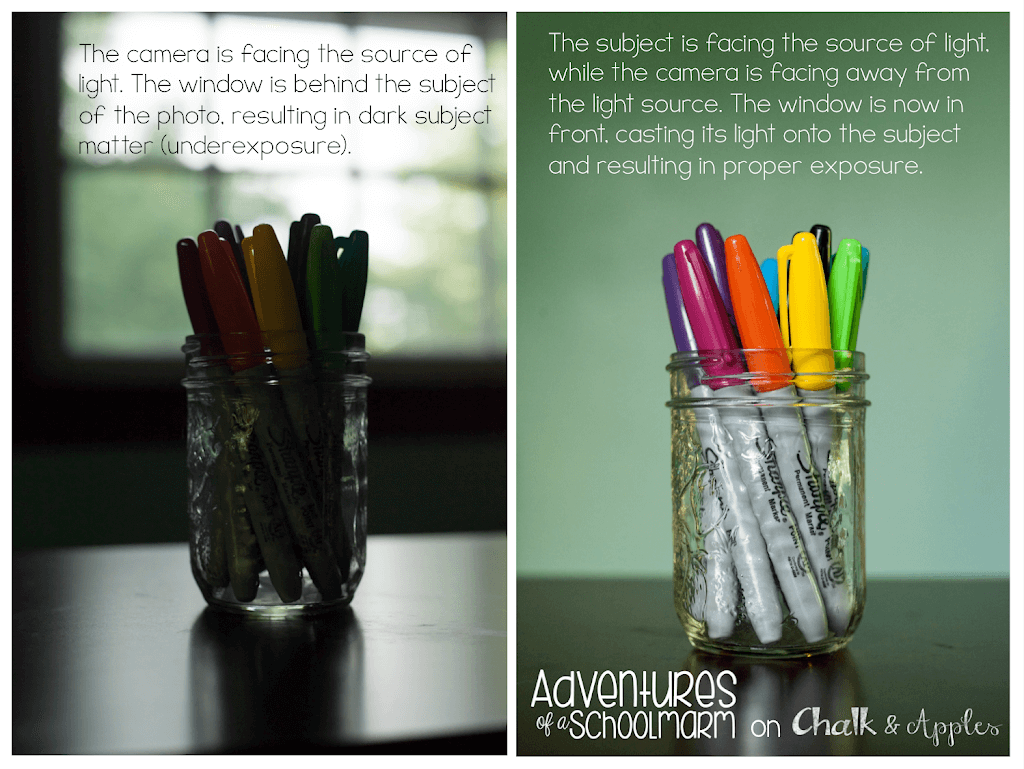
1. Follow the Light

One of the quickest and easiest ways to improve your blog photography is to turn off the automatic flash on your camera and use natural lighting. Using a flash can make your photo feel flat and lifeless, while natural light makes the photo feel more vibrant and appealing.  (Flash can actually be used really successfully to create fill light in your space, but that is much harder to achieve. It’s much easier to just find a window!)

 
Pay attention to where your light source is located. Try to avoid backlighting your photos.  This is when the light source is behind the object or person you are trying to photograph. Instead, face the items or person you want to photograph towards the window so they can catch the natural light. It often helps to slant them at an angle. This helps them catch the light, but you don’t have to step between the object and the light source when you are taking the picture, which can cast a shadow. Don’t be afraid to move the subject of your photograph so that it is utilizing the best natural light source. That is what the pros all do!


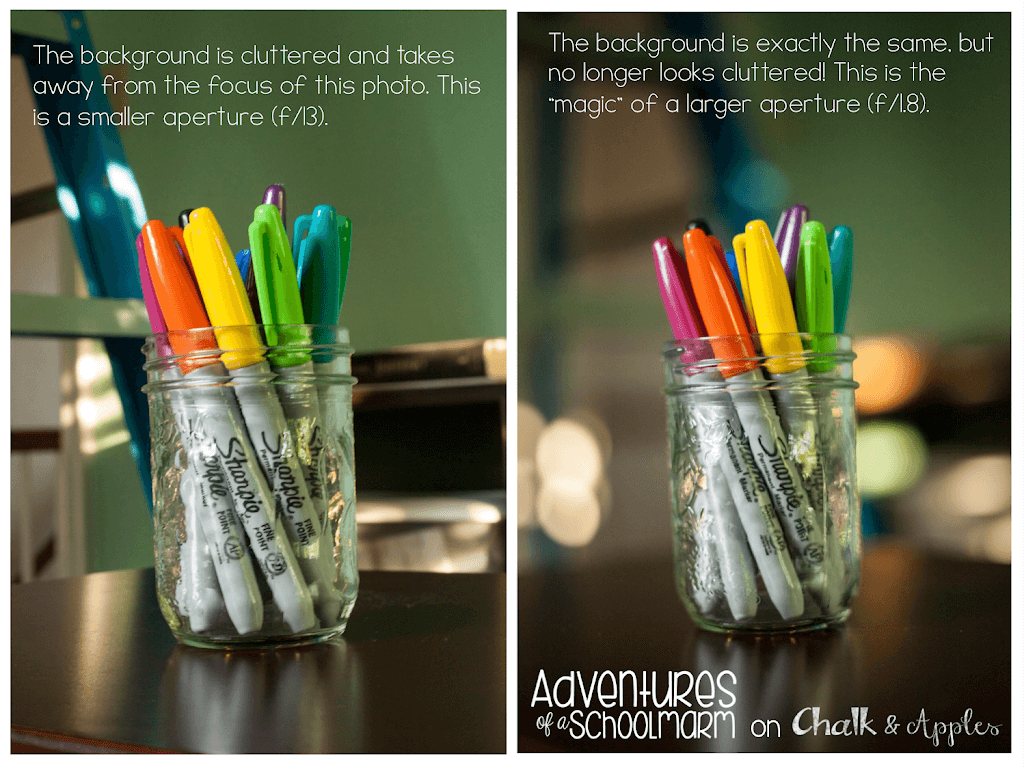
2. Minimize Distractions

With the right equipment and settings, you can create a dramatically shallow depth of field with a dreamy background.  On a camera with automatic settings, you can often use the Macro function to achieve this with smaller objects. (The mode symbol often looks like the outline of a flower.) On a DSLR, this is achieved by shooting in Manual or Aperture Priority, then manipulating the aperture (f-stop) within your settings.


Don’t be afraid to experiment with your settings! Many kit lenses only allow you to change your aperture to as wide as 4.5, but prime lenses let you go much wider (to a 1.8 or even larger).  I highly recommend purchasing a 50mm f/1.8 lens that is compatible with your camera. As far as lenses go, it is both affordable and functional. Mine is ALWAYS in my camera bag!
 

3. Find a Unique Perspective

Giving your photos a unique perspective makes them more interesting to your audience. Try to look for new perspectives that best highlight subject while keeping things interesting.  One strategy is to get low and shoot closely. This really helps draw the viewer’s eye to the subject of your photo.


Another strategy is to shoot your subject at a different angle. Pay attention to where the lines in the photo draw your eye. You want the lines to lead to the part of the photo where you want the viewers to focus their attention.


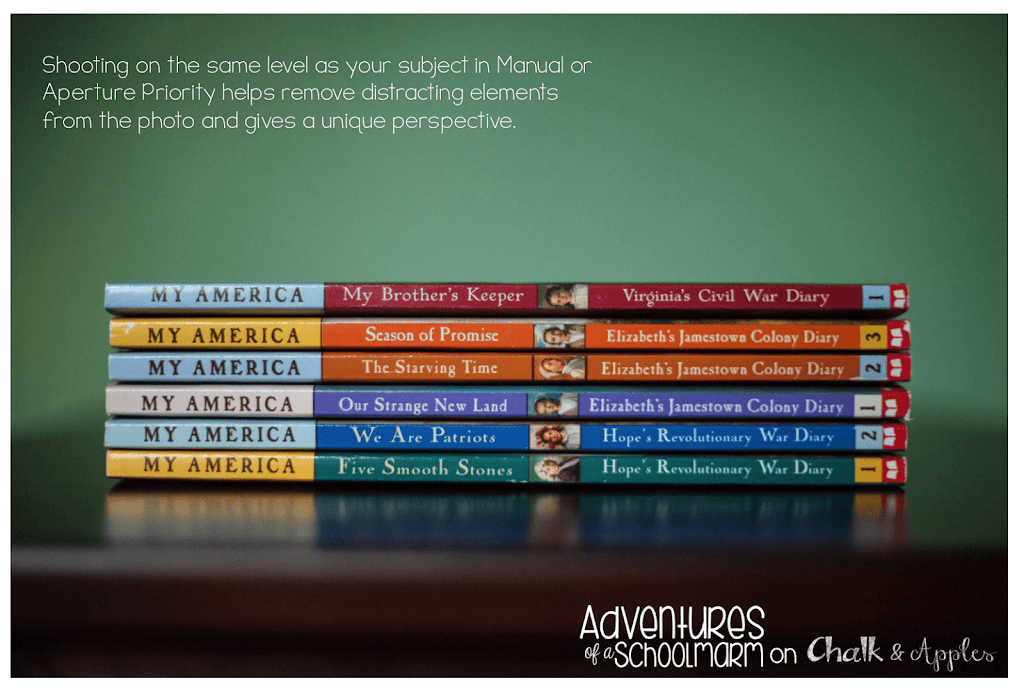
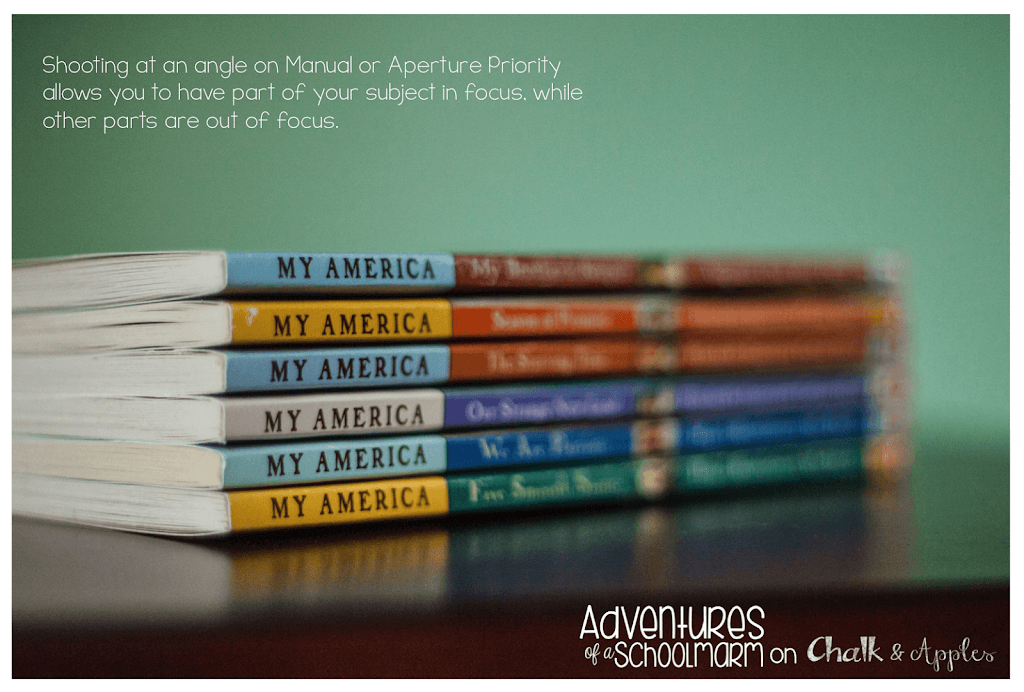
You can also shoot from directly above your subject! Don’t be afraid to stand on a chair or step stool If you are unable to get high enough above your subject, then you can also move it to the floor and shoot it while standing over it.


If you would like more photography tips and tutorials, be sure to follow my blog. I am planning to do a special series this summer to help you get away from the automatic settings and shooting in manual. You will feel so much more empowered over your own photography when you do so… I promise!

A Note from Kristen:
I am so excited to have my very first guest blogger today! I asked my good friend, Beth, from Adventures of a Schoolmarm to give us some expert tips on taking gorgeous photos for our blog posts.

If you haven’t checked out Beth’s TPT store, you need to (because I know she won’t toot her own horn!). She has some fantastic educational resources!

3 tips for better blog photos